Compost Cake
This “culinary” experience isn’t one to complete in the kitchen, but has a direct connection to our food, more specifically, our food waste. “Baking” a compost cake is a great hands-on way to introduce students to soil building through decomposition. What we would normally think of as waste products, like food scraps and dead leaves, become the ingredients in our cake; and over time, become part of the soil to support growing more food. Compost cake layers consist of nitrogen-rich greens and carbon-rich browns generously sprinkled with native soil. The “sprinkles” add microbes that will break down the components into nutrient rich soil.
Compost Cake Recipe
Ingredients:
- Cardboard box
- Carbon-rich Browns – dried plant matter, dead leaves, straw, thin cardboard or paper all work well. *For the proper decomposition ratio, you need twice as much “browns” as “greens”
- Nitrogen-rich Greens – fresh plant matter, grass clippings, garden and kitchen scraps (vegetable and fruit only) *Most grocery stores will be happy to provide you with produce scraps or you may be able to collect banana peels and apple cores from school lunches.
- Soil or compost – any native soil or garden soil; do not use bagged potting soil. Soil will provide the microorganisms necessary for decomposition.
- Watering can
Instructions:
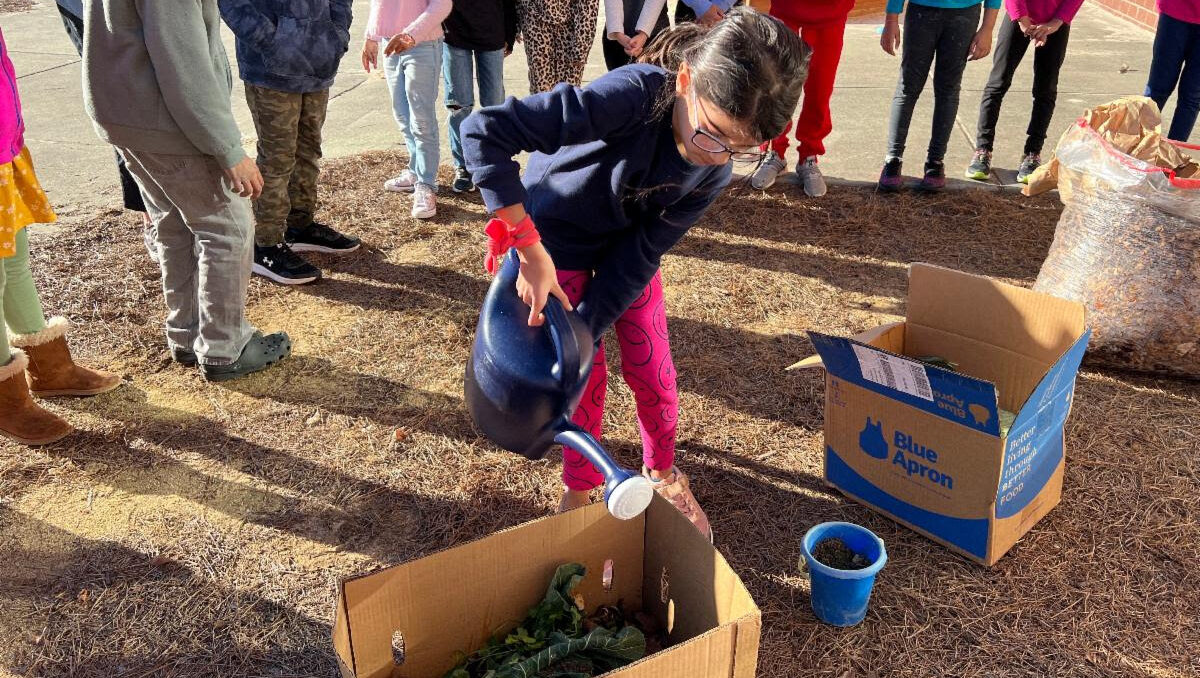
1. Prepare the box by punching a few holes in the bottom and sides of the box to provide adequate air circulation. The box is now ready to be your “cake pan.” If there is a tree close by, have students gather twigs and small branches or acorns to place in the bottom of the box to further help with air circulation.
2. Tell students that today we will be using microbes found in the soil to help us “bake” a compost cake. Just like cake provides energy and nutrients for us, compost cake provides nutrients for the soil, and just like with cake we eat, the best cakes have a lot of layers!
3. Divide your students into the following groups: Browns, Greens, Soil, and Water.
4. Have students take turns creating the layers, each student will get a handful of their designated ingredient and place it into the cake pan. To help keep the desired ratio of greens to browns I like to have two browns for every green.
Example:
- 2 students layer handfuls of browns
- 1 student layers handfuls of greens
- 1 student layers handfuls of soil
- 1 student adds water
5. Continue this process until all of the materials have been used, then give it a final watering because no one wants dry cake! Ask the kids to be creative and locate a candle for our cake (a stick or pencil will do).
6. Keep your compost cake outside and water as needed to keep moist. Have students make observations of the cake as it decomposes. Be sure to look for worms and other invertebrates that come to help the process.
7. A fun extension is to place a thermometer in the cake and see what happens as the microbes begin the decomposition process. The results line up well with our idea of “baking” the cake.
- Categories: